
In This Article
Why an Ergonomic Computer Keyboard Stand Matters More Than Your Fancy Keyboard
Here’s an uncomfortable truth: you can spend $200 on a split mechanical keyboard and still wreck your wrists if it sits at the wrong height. Most desks in American homes and offices land somewhere around 29 to 30 inches tall, which is fine for writing with a pen but too high for most people to type on comfortably. The result? Shrugged shoulders, bent-back wrists, and that dull ache that shows up around 3 p.m. and never quite leaves.
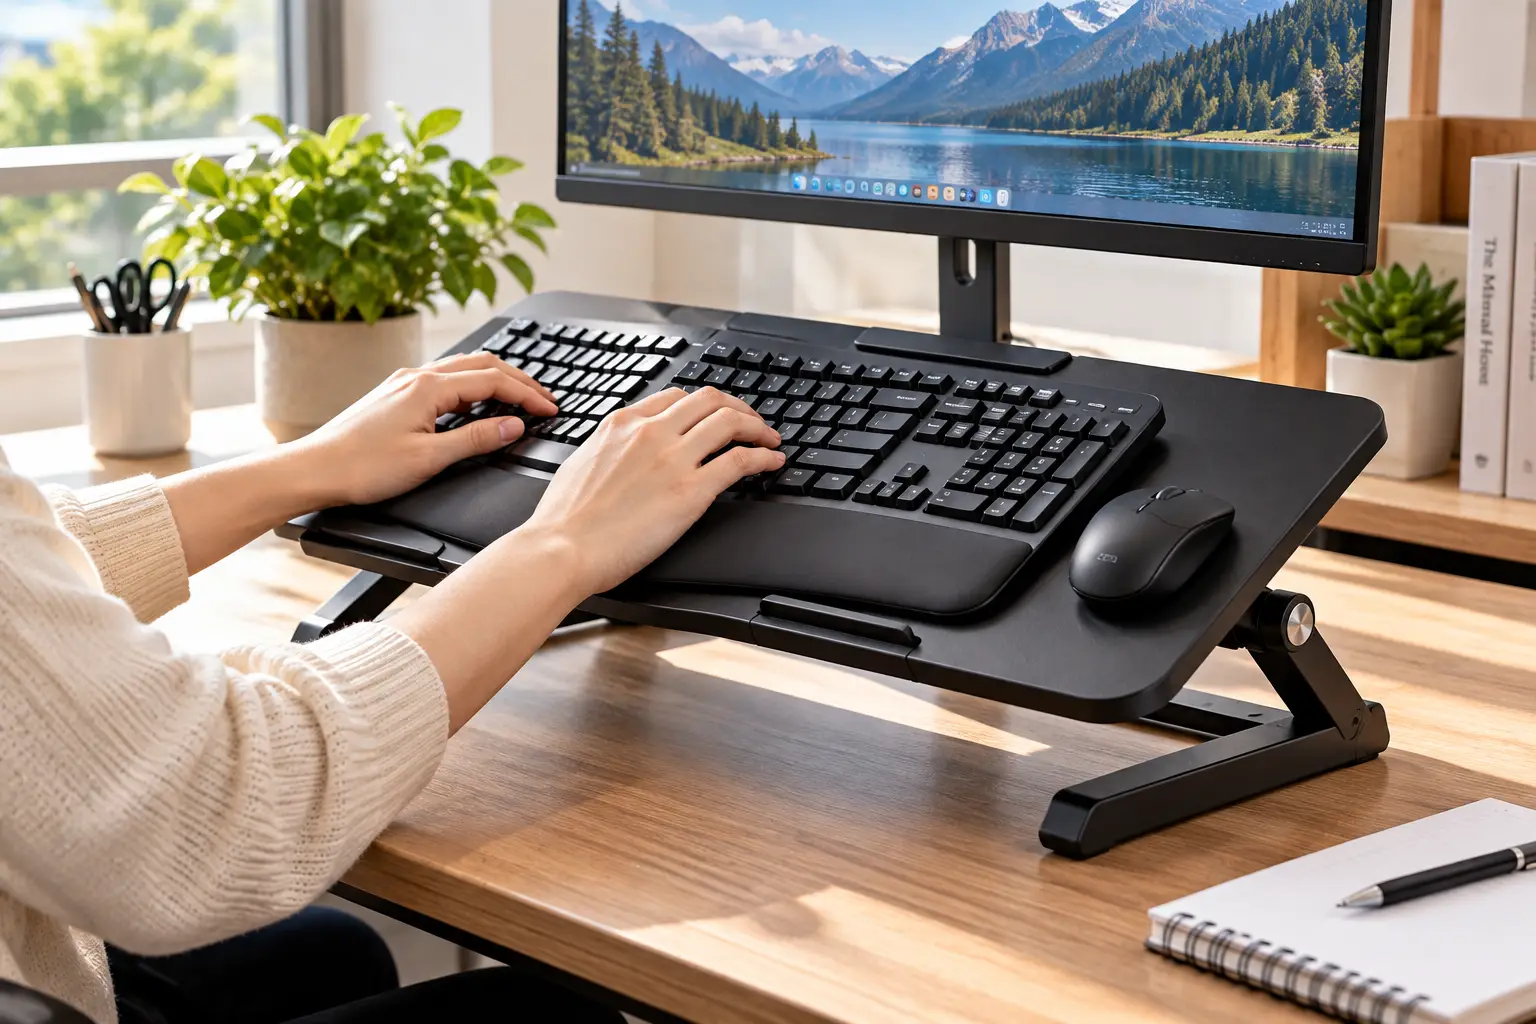
An ergonomic computer keyboard stand fixes the problem at its source. Instead of forcing your body to adapt to the desk, it brings your keyboard and mouse down to elbow height—and, on the better models, tilts the keyboard slightly away from you so your wrists stay straight. It’s one of the cheapest, highest-impact upgrades you can make to a workstation, and it frees up a surprising amount of desk space in the process.
In this guide, we compare seven real products available on amazon.com, from no-drill budget sliders to a Humanscale-engineered executive tray. We don’t pretend to have bolted every one of these under our own desks. Instead, we’ve done the homework: cross-referencing manufacturer spec sheets, published ergonomics research, and the recurring themes in real customer reviews. You’ll get honest analysis of what each spec actually means in daily use, who each tray is genuinely right for, and the gotchas listings tend to bury (like crossbar clearance and clamp-to-clamp width).
By the end, you’ll know exactly which ergonomic computer keyboard stand fits your desk, your body, and your budget—and how to set it up so it actually helps.
What Is an Ergonomic Computer Keyboard Stand?
An ergonomic computer keyboard stand is a platform—usually mounted under the desk—that holds your keyboard (and often your mouse) at or slightly below seated elbow height, ideally with adjustable height and tilt, so your wrists, forearms, and shoulders stay in a relaxed, neutral posture while you type.
That definition matters because the phrase covers a few different product types. The most common is the under desk keyboard tray, which slides out on a track. Some clamp on with no drilling; others screw into the underside of the desk. Higher-end versions are “articulating,” meaning the platform rides on an arm that adjusts height and tilt independently.
Why does height and tilt matter so much? The OSHA Computer Workstations eTool on keyboards explains that keyboards placed too low push you to type with your wrists bent up, while keyboards placed too high make you raise your shoulders—and it recommends keyboard setups that are adjustable in both height and tilt. Translation: a keyboard sitting flat on a standard desk is often the wrong setup for most adults, not the default “safe” choice.
There are also desktop keyboard risers and tilt stands, but for most people sitting at a fixed-height desk, an under-desk tray is the only way to get the keyboard low enough. We focus on trays and drawers here for exactly that reason.
Quick Comparison: 7 Top Keyboard Trays at a Glance
| Product | Type | Tilt | Price Range | Best For |
|---|---|---|---|---|
| VIVO MOUNT-KB05E | Clamp-on slider | None (flat) | ~$30–$55 | VIVO MOUNT-KB05E: renters, no-drill budget setups |
| VIVO MOUNT-KB05HB | Clamp-on, height-adjustable | None (flat) | ~$45–$70 | VIVO MOUNT-KB05HB: fine-tuning height without drilling |
| Fellowes Office Suites Underdesk Keyboard Drawer | Screw-mount drawer | None (flat) | ~$30–$50 | Fellowes Office Suites: compact keyboards, tight budgets |
| Kensington SmartFit Keyboard Drawer (K60004US) | Screw-mount drawer | None (flat) | ~$45–$65 | Kensington SmartFit: wide and ergonomic keyboards |
| HUANUO 25″ 360° Keyboard Tray | Articulating, track-mounted | +6° / −22° | ~$50–$90 | HUANUO 25″: sit-stand users on a budget |
| EUREKA ERGONOMIC Height Adjustable Tray | Articulating, beam-friendly | Adjustable (limited negative) | ~$90–$130 | EUREKA ERGONOMIC: gamers and desks with crossbars |
| Fellowes Professional Series Executive Keyboard Tray (8036101) | Premium articulating | 0° to −10° | ~$300–$650 (varies widely) | Fellowes Professional Series: all-day typists who want pro-grade build |
Looking at the table, the split is clear: the first four picks solve the height problem but leave the keyboard flat, while the HUANUO 25″, EUREKA ERGONOMIC, and Fellowes Professional Series trays also solve the tilt problem. If wrist discomfort is your main complaint rather than shoulder tension, that tilt column deserves more weight than the price column. Budget buyers should note that the HUANUO 25″ is the cheapest way into genuine negative tilt.
💬 One click helps other shoppers make an informed choice too! 😊
Top 7 Ergonomic Computer Keyboard Stand Picks: Expert Analysis
1. VIVO MOUNT-KB05E — best no-drill budget slider
The VIVO MOUNT-KB05E is the tray you buy when you want your keyboard lower tonight and can’t (or won’t) drill into your desk. It’s a 27-inch-wide platform (about 33 inches including clamps) by 11 inches deep, riding on steel tracks that attach with C-clamps. The practical meaning: it gives you a full-size keyboard plus mouse on one surface, and it disappears under the desk when you’re done.
Based on the spec sheet, it holds up to roughly 11 pounds and slides out several inches from the desk edge—enough for a keyboard and mouse, not for a laptop and coffee. The catch most buyers overlook is clamp-to-clamp width: you need about 33 inches of clear space under the desk edge, and the tray isn’t compatible with beveled desk edges. Measure before you click.
This is ideal for renters, students, and anyone with a hand-me-down desk. It does not tilt, so it addresses height but not wrist angle. Reviews consistently praise its sturdiness for the price and VIVO’s responsive customer service; a recurring complaint is that clamps occasionally need realignment after installation.
Pros:
- ✅ Installs with clamps, no holes in your desk
- ✅ Wide surface fits keyboard and mouse together
- ✅ Steel tracks feel solid for a budget tray
Cons:
- ❌ No tilt adjustment at all
- ❌ Needs about 33 inches of clear clamp width
At roughly $30 to $55, it’s arguably the best value for anyone whose main problem is “my desk is too high.”
2. VIVO MOUNT-KB05HB — height tuning without power tools
The VIVO MOUNT-KB05HB takes the same basic formula and adds the one thing the base model lacks: height adjustment. Per VIVO’s listing, it offers 2.4 inches of total adjustment across five set points, plus sturdy C-clamps rated for desktops up to 3.4 inches thick.
Why does 2.4 inches matter? Because the right keyboard height is personal—it depends on your chair, your torso length, and whether you use armrests. A fixed-drop tray can land a little too high or too low for you; five set points let you dial it in. The thicker clamp range also means it works on chunkier desks that the base VIVO MOUNT-KB05E can’t grab.
This is the pick for someone who shares a desk (a couple working from home in shifts, for example) or who isn’t sure exactly where “right” is yet. It’s still a flat platform, so pair it with a slim, low-profile keyboard to keep wrists as straight as possible. Honest note: we found fewer verifiable, product-specific reviews for this variant than for the base model, so most confidence here comes from the shared VIVO platform design and its well-documented track record.
Pros:
- ✅ Five height settings across 2.4 inches
- ✅ Clamps fit desktops up to 3.4 inches thick
- ✅ Same roomy 27-inch platform as the base model
Cons:
- ❌ Still no tilt for wrist angle
- ❌ Fewer verified reviews than the base model
Expect around $45 to $70—worth the premium over the base model if you’ll use the adjustability.
3. Fellowes Office Suites Underdesk Keyboard Drawer — compact and dependable
The Fellowes Office Suites Underdesk Keyboard Drawer is the classic office drawer: a screw-mounted track, a 20⅛-inch by 7¾-inch keyboard tray, and a separate 7⅜-inch mouse tray that mounts left or right—or stows underneath.
Three height settings place the keyboard 1¾, 2⅛, or 2½ inches below the track, and ball-bearing glides keep the slide smooth. What that means in practice: it’s a modest drop, enough to bring a standard keyboard closer to elbow height for most average-height users, but not the deep drop taller desks or shorter users may need. The flip-out mouse tray is the clever bit—lefties get the same convenience as righties.
It needs about 23½ inches of mounting width and requires drilling, so it’s best for people who own their desk. The tray depth is shallow, which suits compact and tenkeyless keyboards better than big ergonomic boards. Aggregated review sentiment is positive—buyers highlight how much desk space it frees and that the included drilling template makes installation straightforward. The most common complaint is that the keyboard surface is slippery, which a thin non-slip mat fixes cheaply.
Pros:
- ✅ Mouse tray mounts left, right, or stows
- ✅ Ball-bearing glides for smooth sliding
- ✅ Narrow footprint suits smaller desks
Cons:
- ❌ Shallow tray crowds large ergonomic keyboards
- ❌ Requires drilling into the desk
At about $30 to $50, it’s a solid value for compact setups.
4. Kensington SmartFit Keyboard Drawer (K60004US) — roomiest for big keyboards
The Kensington SmartFit Keyboard Drawer (K60004US) stands out for one simple reason: width. Its extra-wide 26-inch tray has room for oversized and ergonomically shaped keyboards plus an integrated mousing area, gel wrist rest, and mouse pad.
Kensington’s SmartFit system uses a color-coded chart to help you pick one of the mounting heights (the listings cite 2, 2.5, and 4 inches). It’s a simple idea, but it removes guesswork—you measure yourself, match a color, and mount accordingly. Built-in cable management keeps cords from snagging when the drawer slides. It’s also TAA compliant, which matters if you’re buying for a government or contractor office.
This drawer is a smart match for anyone using a split, curved, or full-size board with a number pad who’s tired of trays that are three inches too narrow. Like the Fellowes drawer, it’s flat and screw-mounted. The review samples we could verify at US retailers were small but positive, with buyers appreciating the generous space; one reviewer noted needing the lowest mounting setting so a raised keyboard wouldn’t hit the desk.
Pros:
- ✅ 26-inch tray fits oversized ergonomic keyboards
- ✅ SmartFit color system simplifies height choice
- ✅ Integrated cable management and gel wrist rest
Cons:
- ❌ Height is set at install, not on the fly
- ❌ Flat platform offers no negative tilt
Typically around $45 to $65, it’s excellent value for big-keyboard users.
5. HUANUO 25″ 360° Keyboard Tray — cheapest real negative tilt
The HUANUO 25″ 360° Keyboard Tray is where this list crosses from “drawer” into true articulating keyboard tray. According to the spec sheet, it swivels 180 degrees, tilts 6 degrees up and 22 degrees down, and offers 6.3 inches of total height adjustment on a 25-by-9.84-inch platform.
That 22 degrees of downward tilt is the headline. It’s the feature ergonomists actually care about, because it lets the keyboard slope away from you to match the natural angle of your forearms—something none of the four drawers above can do. The 6.3 inches of height range also means it can follow a sit-stand desk through both positions.
The catch is installation geometry. HUANUO specifies at least 14.17 inches between the desk edge and any crossbar (16.22 inches if you want it to fully stow), a desk thicker than 0.6 inches, and extra side clearance if you plan to swivel it. On many standing desks with a front crossbar, that’s a dealbreaker—so check before ordering. Review roundups consistently rank it as a best-value pick; the recurring caution is about verifying clearance first. Note that HUANUO sells several similar variants, including one listing 7.8 inches of height adjustment—confirm the exact model you’re buying.
Pros:
- ✅ Up to 22° negative tilt for neutral wrists
- ✅ 6.3 inches of height range for sit-stand use
- ✅ Swivels for flexible positioning
Cons:
- ❌ Demanding crossbar and depth clearance requirements
- ❌ Platform narrower than some ergonomic keyboards
At roughly $50 to $90, it’s the best bang-for-buck articulating tray we found.
6. EUREKA ERGONOMIC Height Adjustable Tray — built for beam-crossed desks
The EUREKA ERGONOMIC Height Adjustable Tray solves the problem that trips up the HUANUO 25″: its mechanical design fits desks with beams. You get a large 28.35-by-10.24-inch carbon-fiber-textured board, 360-degree horizontal rotation, height adjustment, and tilt.
The extra width is the practical win—a full-size keyboard and mouse fit side by side with room left over. A raised front lip doubles as a wrist ledge and stops the keyboard from sliding when tilted. EUREKA’s own listing quotes a 15-degree vertical tilt, while several retailers advertise a larger combined range; reviewers describe the negative tilt as present but limited. Treat it as a “mild tilt” tray, not a deep-tilt specialist. It needs a desktop at least 18mm (about 0.7 inch) thick, in wood or MDF—glass and stone are out.
This is a strong fit for gamers who like a wide mousing surface and sit-stand users with crossbar-heavy desks. Aggregated reviews repeatedly call it sturdy and roomy. Two complaints show up again and again: height and tilt are controlled through one linked knob rather than separately, and that knob can sit where your right knee wants to go when you pull in close.
Pros:
- ✅ Fits many desks with crossbeams
- ✅ Extra-wide 28-inch surface for keyboard and mouse
- ✅ Front lip keeps keyboard from sliding
Cons:
- ❌ Adjustment knob can bump knees when seated
- ❌ Height and tilt adjust together, not independently
Usually around $90 to $130—fair for its size and beam compatibility.
7. Fellowes Professional Series Executive Keyboard Tray (8036101) — pro-grade, Humanscale-engineered
The Fellowes Professional Series Executive Keyboard Tray (8036101) is the “buy once, cry once” option. It’s designed and manufactured for Fellowes by Humanscale, a name ergonomists respect, and it shows in the details.
Per published specs, the arm adjusts from 1¼ inches above to 5 inches below the desk, with tilt from 0 to −10 degrees—a deliberately negative-only range that aligns with university ergonomics guidance. A lift-and-lock mechanism means you adjust height with one hand: tilt the platform, move it, and straighten to lock. The 8.5-inch mouse platform can slide over the number pad, which keeps your mouse closer to your body—a subtle but real shoulder saver. Height and tilt indicators let you return to “your” setting after a coworker borrows the desk. Memory foam wrist supports and ANSI/BIFMA compliance round it out.
This tray is best for full-time typists, writers, coders, and anyone with recurring discomfort who wants a mechanism that will outlast several desks. Honest caveat: availability and pricing vary considerably across sellers, and some retailers list it as discontinued, so check the current Amazon listing carefully. The limited retailer reviews we found praise the independent mouse platform adjustments.
Pros:
- ✅ Humanscale-built arm with one-hand lift-and-lock
- ✅ Negative-only tilt that matches ergonomic guidance
- ✅ Mouse platform slides over the number pad
Cons:
- ❌ Price is several times the budget options
- ❌ Availability on Amazon can be inconsistent
Expect anywhere from around $300 to $650 depending on seller—strong long-term value if you type all day.
Side-by-Side Specs: Tilt, Height, and Fit
| Product | Platform Size | Height Adjustment | Mount | Best For |
|---|---|---|---|---|
| VIVO MOUNT-KB05E | ~27″ x 11″ | Fixed drop | C-clamp | VIVO MOUNT-KB05E: quick, no-drill fix |
| VIVO MOUNT-KB05HB | ~27″ x 11″ | 2.4″, 5 set points | C-clamp (to 3.4″ thick) | VIVO MOUNT-KB05HB: shared desks |
| Fellowes Office Suites | 20⅛” x 7¾” + mouse tray | 3 settings (1¾”–2½” below track) | Screws | Fellowes Office Suites: compact keyboards |
| Kensington SmartFit | 26″ wide | 3 mounting heights | Screws | Kensington SmartFit: wide/split keyboards |
| HUANUO 25″ | 25″ x 9.84″ | 6.3″ total | Track (clearance needed) | HUANUO 25″: budget negative tilt |
| EUREKA ERGONOMIC | 28.35″ x 10.24″ | Adjustable, knob-linked | Beam-friendly | EUREKA ERGONOMIC: crossbar desks |
| Fellowes Professional Series | 19″ x 10.63″ + 8.5″ mouse | +1¼” / −5″ | Track, 21¾” glide | Fellowes Professional Series: all-day typists |
Reading across the height column, the jump from fixed drop (the VIVO MOUNT-KB05E) to 6.3 inches of range (the HUANUO 25″) is the difference between “better than nothing” and “fits a sit-stand desk.” The Fellowes Professional Series has less raw range than the HUANUO 25″, but its precision mechanism and indicators make returning to an exact position easy. Desk construction should drive your final decision: clamps for renters, screws for owners, beam-friendly hardware for crossbar desks.
✨ Don’t miss these carefully chosen picks!
🔍 Take your workstation comfort to the next level with this curated lineup. Click a highlighted product name to check current pricing and availability—these picks can help you type longer with fewer aches and a clearer desk!
How to Set Up Your Keyboard Tray in 15 Minutes (and Actually Get It Right)
Buying a great tray is half the job. Setting it up correctly is the other half—and it’s where most people go wrong. Here’s a practical sequence.
Step 1: Set your chair first. Adjust seat height so your feet rest flat and your thighs are roughly parallel to the floor. Everything else references this position, so don’t skip it.
Step 2: Find your elbow height. Sit back, relax your shoulders, and let your upper arms hang. Bend your elbows to roughly 90 degrees. The home row of your keyboard should sit at or just below that height.
Step 3: Mount, then measure. For clamp-on trays like the VIVO MOUNT-KB05E, tighten clamps evenly—alternate sides rather than cranking one fully. For screw-mount drawers like the Fellowes Office Suites, use the template and pilot holes so you don’t split particleboard.
Step 4: Add tilt gradually. On articulating trays like the HUANUO 25″, start flat and lower the front edge of the tray a few degrees at a time until your wrists feel straight rather than bent back. Don’t jump straight to maximum tilt.
Step 5: Flatten your keyboard’s feet. Those little flip-out legs on the back raise the rear edge—the opposite of what you want on a tilted tray. Fold them in.
Step 6: Bring the mouse close. Your mouse should sit at the same height as the keyboard, as close to your body as practical.
Your first 30 days: expect a short adjustment period, especially with negative tilt. Re-check clamps after the first week, since tracks settle. And if anything feels worse after a few days, raise the tray slightly—you’ve probably overshot.
Real-World Scenarios: Which Tray Fits Your Life?
Specs make more sense when you attach them to real people. Here are three common profiles and the reasoning behind each match.
The apartment-dwelling grad student
Budget: under $60. Use: 6–8 hours a day on a secondhand desk she can’t drill. For her, the VIVO MOUNT-KB05E is the obvious starting point. It clamps on, comes off cleanly at move-out, and immediately lowers her keyboard from desk height. If she’s on the shorter side and the fixed drop isn’t enough—or too much—stepping up to the VIVO MOUNT-KB05HB for its five height settings is worth the modest extra cost.
The remote software engineer with a standing desk
Budget: flexible. Use: 9+ hours a day, alternating sitting and standing. Standing changes the equation because there are no armrests, so a deeper negative tilt becomes more useful. If his desk has open space behind the front edge, the HUANUO 25″ delivers 22 degrees of downward tilt and enough height range to follow the desk up and down. If a front crossbar blocks installation, the EUREKA ERGONOMIC tray is the better fit thanks to its beam-friendly mount. If budget allows and the clearance works, the Fellowes Professional Series offers more refined, repeatable adjustments.
The accountant with a giant ergonomic keyboard
Budget: around $60. Use: data entry all day, full-size split keyboard with a number pad. Width is her biggest problem—most trays are too narrow. The Kensington SmartFit drawer’s 26-inch tray is built for exactly this, with a wrist rest and mousing area included. Since she owns her desk, screw mounting is no issue.
The pattern across all three: start with desk construction and keyboard size, then match tilt needs to how many hours you type.
Problem → Solution: Fixing Common Keyboard Tray Headaches
Even a great tray can cause frustrations. Here are the problems buyers mention most, and how to solve them.
Problem 1: “The tray bounces when I type.” Bounce usually comes from loose clamps or an over-extended slide. Re-tighten clamps evenly and type with the tray pushed in slightly rather than at full extension. Cornell’s ergonomics guidance notes that poorly designed trays can bounce and disrupt typing, so stability is a legitimate buying criterion, not a nitpick.
Problem 2: “My knees hit the tray.” Check thigh clearance before tightening anything. On the EUREKA ERGONOMIC, reviewers specifically report the adjustment knob bumping knees—angle your chair slightly or raise the tray a notch. Lowering your chair is sometimes the faster fix.
Problem 3: “My keyboard slides down the tilted tray.” Use the tray’s front lip or bumpers, add a thin non-slip mat, and fold in the keyboard’s rear feet. This is also the fix for the slippery surface buyers note on the Fellowes Office Suites drawer.
Problem 4: “The tray won’t fit under my standing desk.” Measure the distance from the desk’s front edge to any crossbar. If it’s under the roughly 14 inches the HUANUO 25″ requires, choose a beam-compatible design like the EUREKA ERGONOMIC, or a clamp-on slider that mounts at the edge.
Problem 5: “My mouse ends up miles away.” Pick a tray with an integrated mousing area (like the Kensington SmartFit) or a movable mouse platform (like the Fellowes Professional Series), so your mouse stays at keyboard height and close to your body.
How to Choose an Ergonomic Keyboard Tray
Choosing an ergonomic keyboard tray comes down to seven checks, in this order:
- Measure your desk first. Note thickness, edge shape (beveled edges defeat many clamps), clamp width, and crossbar distance. Most returns happen because buyers skip this step.
- Decide clamp vs. screw mount. Clamps suit renters and shared furniture; screw-mount drawers are often more compact and sturdier long term.
- Check height range against your body. Shorter users at standard desks need a deeper drop; sit-stand users need several inches of range.
- Prioritize negative tilt if wrists hurt. Flat trays fix height; only articulating trays fix wrist angle.
- Match tray width to your keyboard. Split and full-size ergonomic keyboards need 25 inches or more of usable width.
- Plan your mouse. Same height, close to the keyboard—integrated or adjustable platforms both work.
- Think about who else uses the desk. Height and tilt indicators make shared workstations far easier.
For the research behind step 4, Cornell’s ergonomic typing posture tutorial describes the ideal posture as having the keyboard below seated elbow height with its base sloping gently away from the user, and it notes that studies have failed to show conventional keyboard trays substantially improve wrist posture. That second point is important: a flat tray beats a desk that’s too high, but the real wrist benefit comes from the downward slope.
Under Desk Keyboard Tray vs. Desktop Stand vs. Typing on the Desk
| Setup | Height Fix | Wrist Angle Fix | Desk Space | Best For |
|---|---|---|---|---|
| Keyboard flat on desk | ❌ Usually too high | ❌ Often bent up | Uses desktop | Short, occasional typing |
| Desktop tilt stand/riser | ❌ Raises keyboard higher | ⚠️ Partial | Uses desktop | Laptops, tablets |
| Flat under desk keyboard tray | ✅ Yes | ⚠️ Neutral at best | ✅ Frees desktop | VIVO MOUNT-KB05E, Kensington SmartFit |
| Articulating negative-tilt tray | ✅ Yes | ✅ Yes | ✅ Frees desktop | HUANUO 25″, Fellowes Professional Series |
The table reveals something counterintuitive: a desktop “keyboard stand” that props up the back of the keyboard can actually make wrist extension worse at a standard desk, because it raises the keys and tilts them toward you. An under desk keyboard tray solves the height problem outright, and an articulating tray solves both height and angle. If you type more than a couple of hours a day, the last row is where you want to be.
Desktop risers still have a role—they’re great for laptops paired with an external keyboard, or for tablets. But as a primary ergonomic computer keyboard stand for desk work, under-desk solutions are generally the stronger choice.
🛠️ Ready to fix your typing posture for good?
👉 Compare the highlighted picks above and click any product name to check current pricing and availability. A better setup today can mean fewer aches by the end of the week!
Why a Keyboard Tray With Negative Tilt Changes Everything
If there’s one feature that separates “nice desk accessory” from “genuinely ergonomic,” it’s negative tilt. A keyboard tray with negative tilt lowers the front edge of the platform so the keyboard slopes away from you.
Here’s why that’s not just marketing. When your forearms angle downward toward a keyboard that tilts toward you (the default, thanks to those little feet), your wrists bend backward—what ergonomists call wrist extension. Sustained extension compresses the space in the carpal tunnel where tendons and the median nerve travel. Tilt the keyboard away, and the keys meet your fingers at the angle your forearms already want.
Cornell’s ergonomic design guide on keyboard trays notes that a negative-tilt tray can facilitate both a neutral seated posture and a neutral wrist posture, and recommends trays that allow only downward-sloping adjustment. It also flags that some trays permit an upward incline, which can increase wrist extension.
That’s exactly why the Fellowes Professional Series limits its tilt to 0 through −10 degrees—it simply won’t let you set it wrong. The HUANUO 25″ offers far more range (up to −22 degrees), which is useful for standing, but also means you’re responsible for not overdoing it.
Features that matter less than you’d think
Fancy colors, RGB-friendly carbon textures, and full 360-degree swivel are nice but secondary. Thick gel wrist rests can even backfire if you plant your wrists on them while typing—rests are for pauses, not for keystrokes.
Adjustable Keyboard Stand for Standing Desk Users
Standing desks created a new problem: most people stand with their keyboard at desk height, which still isn’t quite right, and they lose the armrest support they had while sitting. An adjustable keyboard stand for standing desk setups needs to do three things well.
First, it needs height range. As you switch between sitting and standing, your ideal keyboard height relative to the desktop can shift. The HUANUO 25″, with 6.3 inches of range, can usually track those changes without moving the desk itself.
Second, it needs more negative tilt. Without armrests, your forearms hang at a steeper angle. Standing-desk specialists commonly recommend deeper negative angles than for seated work—one reason deep-tilt trays like the HUANUO 25″ appeal to sit-stand users.
Third, it needs to physically fit. This is where many buyers get stuck. Most electric standing desks have a frame crossbar under the desktop that blocks track installation. The EUREKA ERGONOMIC tray’s beam-friendly design exists precisely for this. Clamp-on sliders like the VIVO MOUNT-KB05HB mount right at the edge and avoid the crossbar entirely—though without tilt.
One honest alternative worth knowing about: iMovR’s SteadyType Exo, a front-clamping tray with an extremely wide tilt range, is popular with standing-desk users. It’s sold primarily direct from the manufacturer rather than through Amazon, so it isn’t in our seven, but it’s useful context if you’re weighing premium options.
The rule of thumb: on a standing desk, measure the crossbar before anything else, then prioritize tilt.
Long-Term Cost and Maintenance
| Product | Upfront Range | Expected Upkeep | Value Verdict | Best For |
|---|---|---|---|---|
| VIVO MOUNT-KB05E | ~$30–$55 | Re-tighten clamps periodically | High value, limited ergonomics | VIVO MOUNT-KB05E: short-term or rental desks |
| Fellowes Office Suites | ~$30–$50 | Minimal; add non-slip mat | High value | Fellowes Office Suites: compact long-term setups |
| HUANUO 25″ | ~$50–$90 | Check track and knobs occasionally | Best tilt per dollar | HUANUO 25″: budget sit-stand |
| Fellowes Professional Series | ~$300–$650 | Very low; robust mechanism | Best cost per year if used daily | Fellowes Professional Series: decade-long workstations |
Cost of ownership tells a different story than sticker price. If you type eight hours a day, roughly 2,000 hours a year, even a premium tray works out to pennies per hour over several years. Budget trays win on entry cost, but a wobbly track you replace twice can quickly erase the savings.
Maintenance is refreshingly simple across the board. Every few months, check clamp and bolt tightness, wipe the tracks to remove dust that roughens the glide, and replace worn wrist rests. For articulating trays, avoid forcing the mechanism past its stops. Keep the hardware bag and manual—you’ll want them when you move or swap desks.
Common Mistakes to Avoid When Buying a Keyboard Tray
Skipping the measuring tape. Clamp width, desk thickness, beveled edges, and crossbars cause more returns than defects. Measure twice, buy once.
Assuming “ergonomic” means tilt. Many listings use the word loosely. A flat drawer improves height, but only an articulating tray delivers negative tilt.
Ignoring the mouse. A keyboard at the right height with a mouse still on the desktop just moves the strain to your shoulder.
Buying too narrow. Split and full-size ergonomic keyboards can overhang a 20-inch tray. Check usable width, not just overall width.
Overshooting tilt. More negative tilt isn’t always better. Start mild and adjust gradually; if your fingers have to reach, back off.
Leaving the keyboard feet extended. It undoes the tray’s work by tilting the keys back toward you.
Forgetting leg clearance. A tray that hits your knees will push you farther from the desk, which defeats the purpose.
Safety, Standards, and What “BIFMA” Means
Keyboard trays aren’t heavily regulated consumer products, but a few standards and safety points are worth understanding.
ANSI/BIFMA compliance refers to voluntary performance and durability standards developed by the Business and Institutional Furniture Manufacturers Association. When a listing says a tray “meets ANSI/BIFMA standards,” as the Fellowes Professional Series does, it signals the product was designed and tested to commercial-furniture benchmarks for strength and durability. Budget trays rarely make this claim, which doesn’t mean they’re unsafe—just that you’re relying on the manufacturer’s word.
Weight limits are real limits. Many clamp-on trays, including the VIVO MOUNT-KB05E, are rated around 11 pounds. Leaning on a tray to stand up, or stacking a laptop on it, can bend tracks or strip clamps.
Desk material matters. Particleboard can crack under over-tightened clamps or screws; glass and stone desks aren’t suitable for most mounts at all (the EUREKA ERGONOMIC explicitly excludes them).
Know the health context. Repetitive computer work is associated with conditions grouped under repetitive strain injury, including carpal tunnel syndrome. A tray supports better posture, but it’s one piece of the puzzle alongside breaks, chair setup, and monitor height. If you have persistent numbness, tingling, or pain, talk to a doctor or occupational therapist rather than relying on equipment alone.
FAQ: Ergonomic Computer Keyboard Stand Questions Answered
❓ Is an ergonomic computer keyboard stand worth it for home office use?
❓ Can I install an under desk keyboard tray without drilling?
❓ What is the best keyboard tray for a standing desk with a crossbar?
❓ How much negative tilt should a keyboard tray have?
❓ Do keyboard trays work with split ergonomic keyboards?
Conclusion: Pick the Tray That Fits Your Desk—and Your Body
The best ergonomic computer keyboard stand isn’t necessarily the most expensive one. It’s the one that physically fits your desk, matches your keyboard’s width, and puts your hands at elbow height with your wrists straight.
If you need a quick, no-drill fix, the VIVO MOUNT-KB05E is hard to beat, and the VIVO MOUNT-KB05HB adds welcome height tuning. Desk owners with compact keyboards will be well served by the Fellowes Office Suites drawer, while big-keyboard users should look straight at the Kensington SmartFit. When wrist angle is the real issue, the HUANUO 25″ is the most affordable path to genuine negative tilt, the EUREKA ERGONOMIC is the problem-solver for crossbar desks, and the Fellowes Professional Series is the long-haul investment for all-day typists.
Whatever you choose, remember the order of operations: measure the desk, set the chair, find elbow height, then add tilt slowly. Do that, and even a modest tray can make your workday noticeably more comfortable.
🚀 Your wrists will thank you—start today!
💡 Click any highlighted product name above to check current pricing and availability on Amazon. A small change under your desk can make a big difference in how you feel at 5 p.m.!
Recommended for You
- Standing Desk PC Mount: 7 Best Picks That Actually Hold Up in 2026
- 2 monitor desk setup: 7 Best Arms & Stands That Work (2026)
- Best Two Monitor Stand 2026: 7 Proven Picks for Any Desk
Disclaimer: This post contains affiliate links. As an Amazon Associate, I earn from qualifying purchases made through these links, at no additional cost to you.
✨ Found this article helpful? Share it with someone who needs it! 💬🤗