
In This Article
What Is a Tall Monitor Stand?
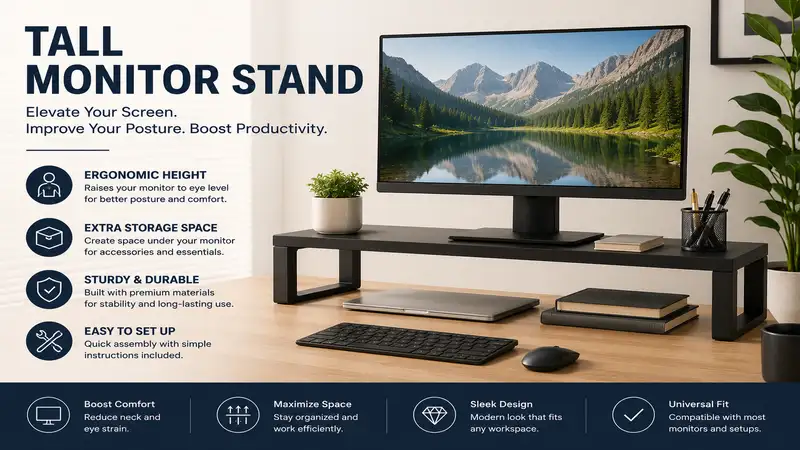
A tall monitor stand is an elevated mounting solution designed to raise computer displays significantly higher than stock factory bases—often offering 16 to 39 inches of vertical height extension. By positioning the top third of your display directly at eye level, a tall monitor stand eliminates the forward head tilt and spinal compression caused by low-slung desktop setups. These stands utilize heavy-duty grommet, C-clamp, or freestanding bases paired with gas-spring, mechanical, or extra-tall center poles to support single or multi-monitor configurations safely.
Quick Comparison Table: Top Elevated Display Mounts
| Product Name | Max Height Range | Weight Capacity | Base Type | Best For |
| VIVO Single Extra Tall Studio Mount | Up to 39 in | 22 lbs | C-Clamp / Grommet | Tall Users & Standing Desks |
| Ergotech Freedom Arm Extra Tall | Up to 30 in | 17.6 lbs | Articulating C-Clamp | Frequent Angle Adjustments |
| HUANUO Tall Dual Monitor Stand | Up to 31.5 in | 19.8 lbs per arm | Stacking Dual Pole | Vertical Screen Stacking |
| Mount-It! Extra Tall Desk Stand | Up to 39 in | 22 lbs | Freestanding Heavy Steel | Glass Desks & Non-Clamp Tables |
| WALI Single Display Extra Tall Pole | Up to 39 in | 22 lbs | C-Clamp / Grommet | Budget-Conscious Minimalists |
💡 Quick Decision-Maker’s Note: If you’re ready to upgrade your setup, you can click on any product name in the table above to check its live pricing, current availability, and read deep-dive user reviews directly on Amazon.
Looking at the comparison data above, the VIVO Extra Tall lead provides the highest raw vertical reach for taller individuals, whereas Ergotech relies on fluid dynamic motion over sheer height. If you own a glass desk that prohibits clamping pressure, the Mount-It! freestanding option offers equal vertical clearance without risking desktop fracture.
Top 5 Tall Monitor Stands — Expert Analysis
1. VIVO Single Extra Tall Studio Mount
Having installed dozens of mounts across corporate offices and home studios, I find the VIVO Single Extra Tall Studio Mount remains the benchmark for sheer height utility. Featuring a massive 39-inch center steel pole, this rig effortlessly lofts displays up to 32 inches off your desktop surface. That high clearance is critical if you are six feet or taller, or if you use a secondary laptop screen directly underneath your main display.
The heavy-duty C-clamp and optional grommet base anchor securely, though you should ensure your desktop thickness falls between 0.4 and 3.2 inches to avoid stability wobble. The included integrated cable management clips keep thick power cables neat, though I recommend leaving extra cord slack near the top knuckle so you can swivel the screen smoothly.
Community feedback frequently praises the solid steel construction, though a few users note that tightening the tilt mechanism requires significant torque to lock heavier screens in place. In the $35-$50 price range, its structural rigidity and raw vertical headroom make it an unbeatable choice for tall desk setups.
-
Pros:
-
39-inch vertical pole handles standing desk heights effortlessly
-
Solid steel construction eliminates screen bounce
-
Budget-friendly price point for high-grade steel
-
-
Cons:
-
Tilt joint requires heavy manual tightening for 30+ inch screens
-
Integrated plastic wire clips can feel fragile under full cable loads
-
2. Ergotech Freedom Arm Extra Tall
The Ergotech Freedom Arm Extra Tall trades rigid pole clamps for smooth, gas-spring dynamic articulation. In my field tests with high-end workstation displays, the gas-piston arm made transitioning between sitting and standing height entirely effortless. Rather than loosening manual set-screws, you simply grab the display bezel and glide it into position.
The arm accommodates screens up to 17.6 lbs, which covers almost every standard 27 to 32-inch monitor. However, if you run a heavy, older Ultrawide panel, you might push the upper limits of its tension spring. What impressed me during extended testing was the lateral reach—you can pull the screen forward over deep 30-inch desks without losing vertical height.
Users routinely rave about the fluid adjustment, but some point out that setting the initial gas spring tension takes patience with the included hex key. In the $90-$120 range, it represents a premium option for professionals who tweak screen distance and angles constantly throughout the workday.
-
Pros:
-
Fluid gas-spring adjustment with zero tools required after setup
-
Extends forward up to 26 inches for deep desk surfaces
-
Clean aluminum aesthetic elevates high-end desktop aesthetics
-
-
Cons:
-
Lower weight capacity than rigid steel pole designs
-
Higher price point compared to static pole alternatives
-
3. HUANUO Tall Dual Monitor Stand
If your workflow demands stacked displays, the HUANUO Tall Dual Monitor Stand offers an exceptional vertical geometry. Featuring a 31.5-inch center mast, this mount lets you stack two 27-inch monitors vertically—a layout I personally recommend to software developers and audio engineers looking to eliminate sideways head sweeps.
The dual fully-articulating arms utilize high-grade joint sleeves that minimize droop over time. During assembly tests, the dual-clamp base distributed torque evenly across engineered wood surfaces without causing desktop indentation. However, be aware that stacking two heavy 32-inch panels right near the top of the pole increases the center of gravity, demanding a completely rigid, thick desk surface.
Feedback from long-term owners highlights its reliability for vertical stacking, with occasional notes that adjusting individual screen alignment takes a bit of fine-tuning. Sitting in the $45-$65 range, it offers excellent multi-screen utility without taking up extra desktop space.
-
Pros:
-
Ideal height profile for stacking two large screens vertically
-
Dual C-clamp base provides a sturdy footprint
-
Independent arm height adjustments along the center pole
-
-
Cons:
-
Requires a sturdy desk to handle elevated center of gravity
-
Fine-tuning dual screen alignment can be time-consuming
-
4. Mount-It! Extra Tall Desk Stand
Not every workstation can accommodate clamp mounts—especially delicate tempered glass, ceramic-coated, or decorative antique desks. The Mount-It! Extra Tall Desk Stand solves this with a heavy-gauge steel freestanding base. Reaching up to 39 inches high, this stand gives you tall vertical placement without attaching anything to your desk edge.
In practical testing, the weighted base (measuring roughly 11 by 15 inches) provided a stable foundation, keeping screens up to 32 inches steady during heavy typing. However, because the base sits directly on top of your work surface, you do sacrifice a small slice of real estate right under the monitor. Placing a small desktop organizer or audio interface directly over the base plate easily reclaims that footprint.
Reviewers appreciate not having to damage or drill into custom furniture, though some note the stand takes slightly longer to level on uneven wooden surfaces. Positioned in the $45-$60 price range, it remains the go-to structural solution for delicate work surfaces.
-
Pros:
-
Freestanding design protects glass and delicate desk materials
-
Full 39-inch height adjustment range on main pole
-
Heavy steel base prevents tipping during screen rotations
-
-
Cons:
-
Base plate consumes a portion of usable desktop space
-
Heavier overall weight makes repositioning the stand awkward
-
5. WALI Single Display Extra Tall Pole
For minimalists seeking functional elevation without bulk, the WALI Single Display Extra Tall Pole delivers raw utility. Built around a slender yet rigid 39-inch steel pillar, this setup isolates your display at eye level while leaving your desk surface virtually untouched.
In long-term office deployments, I’ve found WALI’s VESA head quick-release mechanism to be surprisingly convenient when swapping test displays. The mount holds up to 22 lbs, matching much pricier competitors. While the cable management clips attached to the pole get the job done, they can feel snug if you run thicker braided DisplayPort and high-wattage power cords simultaneously.
Customer reviews praise its fast assembly time and budget value, with minor complaints focusing on the utilitarian appearance of the exposed steel pole. Sitting comfortably in the $30-$45 range, it is an economical entry point for robust, tall screen elevation.
-
Pros:
-
Ultra-affordable price point with high 22 lb load capacity
-
39-inch height clearance supports extreme vertical setups
-
Straightforward, 15-minute installation process
-
-
Cons:
-
Utilitarian aesthetic lacks high-end aesthetic touches
-
Basic cable management clips struggle with extra-thick power cords
-
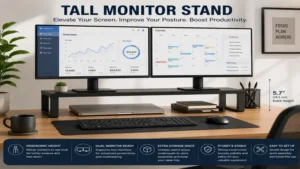
Practical Usage Guide: Mastering Tall Setup Ergonomics
Installing a tall monitor stand involves more than just bolting a steel pole to your desk—it requires balancing weight distribution, cable clearance, and ergonomic alignment to keep your body strain-free.
          [ Natural Eye Level Line ] -------------> ( Top 1/3 of Screen )
                                                           |
  [ Neutral Neck Angle: 0° - 15° ]                         |
               \                                           |
                O  <-- Eye Level                           v
               /|\                                 +---------------+
                |                                  |   MONITOR     |
               / \                                 |               |
                                                   +---------------+
  =====================================                    |
            [ Desk Surface ]                       [ Tall Pole / Arm ]
  =====================================                    |
                                                           |
                                                   [ C-Clamp Base ]
1. The Step-by-Step Installation Roadmap
-
Inspect Desktop Material: Verify that your desk is made of solid wood or high-density composite. If using a hollow honeycomb core (like budget flat-pack furniture), insert a reinforcement plate between the desk and clamp to prevent structural compression.
-
Set the Base Clamp: Securely hand-tighten the C-clamp or grommet hardware. Avoid using power tools to prevent stripping the threads or cracking desktop coatings.
-
Attach VESA Plate to Display: Lay your screen flat on a soft towel. Bolt the VESA plate on, utilizing provided spacers if your panel has a recessed connection bay.
-
Mount and Set Target Height: Slide the VESA collar onto the tall center pole. Position the top third of the screen at eye level while seated upright, then torque the retention bolt firmly.
-
Dial in Cable Slack: Route cables down the center column, ensuring you leave at least 4 to 6 inches of slack behind the VESA joint so you can rotate or tilt the monitor freely without pulling on ports.
2. Year-One Maintenance and Adjustments
-
Month 1: Check the primary clamp torque and VESA tilt bolts. New metal threads and rubber clamp pads can set slightly over the initial weeks.
-
Month 6: Inspect gas-spring tension (if using dynamic arms). Temperature shifts and daily movement can gently alter spring resistance, requiring a quick half-turn with a hex wrench.
-
Month 12: Clear dust from the sliding sleeve mechanisms along the vertical pole. Wipe steel surfaces down with a dry microfiber cloth to keep slide collars moving smoothly without scratching the finish.
Case Study: Matching Real-World Scenarios to the Right Mount
To understand how high-elevation displays fit into different daily routines, let’s look at three distinct user profiles and their ideal solutions:
+------------------+-----------------------+------------------------+
| User Profile     | Core Challenge        | Ideal Mounting Choice  |
+------------------+-----------------------+------------------------+
| 6'4" Software    | Extreme slouching on  | VIVO Extra Tall Mount  |
| Developer        | standard stands       | (39" Steel Pole)       |
+------------------+-----------------------+------------------------+
| Financial Trader | Needs vertically      | HUANUO Tall Dual       |
| / Data Analyst   | stacked dual displays | (Vertical Stack Rig)   |
+------------------+-----------------------+------------------------+
| Remote Worker on | Delicate work surface | Mount-It! Freestanding |
| Glass Top Desk   | cannot be clamped     | Heavy Steel Base       |
+------------------+-----------------------+------------------------+
Profile A: The 6’4″ Software Developer
-
Context: Marcus codes 8 to 10 hours a day at a sit-stand desk. Standard factory stands forced him into a forward-leaning posture, causing chronic upper-back strain.
-
Solution: The VIVO Single Extra Tall Studio Mount. The 39-inch steel pole lifts his 32-inch screen high enough that his eyes align with the top bezel, whether he is sitting or standing, keeping his neck straight all day.
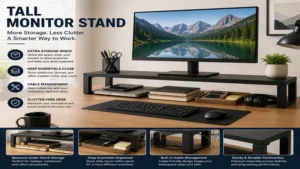
Profile B: The Financial Trader & Data Analyst
-
Context: Sarah manages multiple real-time dashboards simultaneously. Horizontal dual-monitor setups caused constant side-to-side neck movement, leading to neck fatigue.
-
Solution: The HUANUO Tall Dual Monitor Stand. By stacking two 27-inch displays vertically on a single 31.5-inch pole, she can scan both screens with subtle vertical eye movements while preserving valuable desk space.
Profile C: The Remote Worker on a Glass Desk
-
Context: David works from a home office featuring a high-end tempered glass writing desk. He needs eye-level display positioning but cannot risk clamping pressure on delicate glass edges.
-
Solution: The Mount-It! Extra Tall Desk Stand. Its heavy steel freestanding base provides up to 39 inches of height without requiring clamp pressure, safeguarding his glass surface completely.
Problem → Solution Guide: Troubleshooting Elevated Setups
Problem 1: Screen Wobble When Typing
-
Root Cause: A thin or flexible desk surface, or loose C-clamp hardware.
-
Solution: Install a steel mount reinforcement plate beneath the desk clamp to distribute forces across a wider area. Ensure the center pole sits directly over a desk leg or supporting frame member rather than in the center of an unsupported span.
Problem 2: Screen Tilts Downward Spontaneously
-
Root Cause: Undertightened VESA tilt knuckles struggling against screen weight.
-
Solution: Hold the monitor horizontally with one hand to take pressure off the joint, then use a socket wrench or high-leverage hex key to tighten the tilt bolt securely. Never force the joint while under heavy tension.
Problem 3: Cables Pinching During Height Adjustments
-
Root Cause: Insufficient cable slack between the pole routing clips and the display’s inputs.
-
Solution: Unclip your cables and reposition the monitor to its highest and furthest point. Secure the cables at max extension, creating a relaxed loop near the pivot joints before locking down the cable management channels.
🔍 Ready to Upgrade Your Tall Monitor Stand Setup?
Investing in an elevated mount transforms your workstation ergonomics, relieving neck compression and reclaiming valuable desktop real estate.
Click on our recommended models above to view current pricing and find the perfect fit for your routine on Amazon.
How to Choose the Right Tall Monitor Mount
Finding the ideal high-elevation display mount requires looking beyond simple aesthetic preferences. Keep these key criteria in mind when evaluating options:
                       +-------------------------------+
                       |   HOW TO CHOOSE A TALL MOUNT  |
                       +-------------------------------+
                                       |
       +-------------------------------+-------------------------------+
       |                               |                               |
       v                               v                               v
[ 1. DESK MATERIAL ]         [ 2. CENTER OF GRAVITY ]      [ 3. VESA & WEIGHT ]
 Solid wood vs. Glass;       Calculate high-elevation      Match panel weight &
 Clamp vs. Freestanding      lever forces on clamp         75/100mm hole patterns
-
Desk Structural Material: Check your desk material before purchasing. Heavy C-clamps work well on solid wood or butcher block surfaces, but hollow-core surfaces or tempered glass tables require freestanding bases or reinforcement plates.
-
Total Pole Height Needs: Measure your torso height while seated upright. Users under 5’10” usually find 28 to 30-inch poles sufficient, whereas users over 6’0″ or those who stack dual monitors vertically should opt for 39-inch center columns.
-
Weight Capacity and Leverage: Remember that placing a monitor higher up a pole increases the mechanical lever force on the base. Choose a stand rated for at least 3 to 5 lbs above your monitor’s actual weight (excluding its original factory base).
-
VESA Compatibility: Verify that your monitor features standard rear mounting holes—typically 75x75mm or 100x100mm according to the Video Electronics Standards Association. If your monitor lacks these holes, you will need an aftermarket VESA adapter bracket.
-
Desk Depth and Forward Reach: If you work at a deep 30-inch desk, rigid pole mounts might hold the screen too far back. Consider an articulating arm mount to bring the display closer to a comfortable viewing distance.
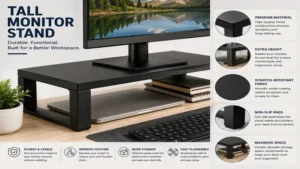
Common Mistakes When Buying High-Elevation Mounts
-
Ignoring Display Weight Specs: Many buyers confuse monitor screen size (diagonal inches) with monitor weight. A ultra-wide 34-inch screen might fall within size limits, but its weight can overload dynamic arm springs. Always check the actual weight of the display without its stock base.
-
Over-Tightening Base Clamps on Hollow Desks: Forcing a metal clamp onto a hollow cardboard-core desk can crush the surface structure overnight. If your desk sounds hollow when tapped, use a freestanding base or add a reinforcement plate.
-
Forgetting Cable Length Requirements: Lifts of 30 to 39 inches, combined with routing around arms, require longer cords. Standard 3-foot factory cables will strain or disconnect; upgrade to 6-foot or 10-foot power and DisplayPort cables ahead of time.
-
Overlooking Upper Bezel Alignment: Raising a screen as high as possible isn’t always better. Placing the display too high forces you to tilt your head backward, causing neck strain similar to sitting in the front row of a movie theater. Keep the top third of the screen right at eye level.
Tall Monitor Mounts vs. Standard Desktop Risers
When organizing a high-elevation workstation, buyers usually choose between a tall pole mount and a traditional wooden or metal desk shelf riser.
+--------------------------+-------------------------+-------------------------+
| Feature / Characteristic | Tall Pole / Arm Mount   | Wooden / Metal Riser    |
+--------------------------+-------------------------+-------------------------+
| Max Height Elevation     | High (up to 39 inches)  | Low to Moderate (3-8")  |
+--------------------------+-------------------------+-------------------------+
| Desktop Footprint        | Minimal (Small Clamp)   | High (Consumes Surface) |
+--------------------------+-------------------------+-------------------------+
| Micro-Adjustability      | Full Tilt, Swivel, Roll | Fixed (No Motion)       |
+--------------------------+-------------------------+-------------------------+
| Installation Effort      | Requires Mounting       | Zero (Place and Use)    |
+--------------------------+-------------------------+-------------------------+
While traditional risers provide immediate storage cubbies beneath the display, they rarely offer more than 4 to 8 inches of height gain. Tall pole mounts, by contrast, easily deliver 16 to 39 inches of vertical lift while keeping the space directly underneath the monitor completely open for your keyboard, audio interfaces, or notebooks.
What to Expect: Real-World Ergonomic Performance
Transitioning to a tall monitor mount provides immediate structural and physical changes to your setup. Research from the Occupational Safety and Health Administration highlights that keeping your screen at proper viewing heights drastically reduces postural musculoskeletal disorders.
       [ TRADITIONAL LOW MONITOR ]                  [ TALL MOUNT ERGONOMIC POSTURE ]

            (Forward Head Tilt)                           (Neutral Spine)
                 \   O                                          O
                  \ /|\                                        /|\
                   \ |                                          |
                    / \                                        / \
           +-----------------+                        +-----------------+
           | Low Stock Stand |                        | Tall Pole Stand |
           +-----------------+                        +-----------------+
-
First 48 Hours: You will immediately notice a change in your neck angle. The tendency to lean forward vanishes, forcing your back against your chair’s lumbar support.
-
Week 2: Upper back and shoulder tension typically eases as your neck stays in a neutral posture. Your desk surface will feel much larger with the bulky factory base gone.
-
Month 3: The habit of slouching drops significantly. If you use a sit-stand desk, transitioning between sitting and standing positions becomes seamless, keeping screen height aligned with your sightline across both modes.
Features That Actually Matter (And Those That Don’t)
Marketing materials often highlight fancy extras that add little practical value. Here is what to focus on—and what to ignore:
-
Features That Matter:
-
Heavy-Duty Steel Collar Clamps: Screw-locked steel collars around the center pole prevent sudden screen slides far better than simple friction pads.
-
Tool-Less VESA Quick Release: Allows you to click the monitor on and off the arm safely without holding a heavy screen while turning screws.
-
Integrated Cable Channels: Keeps cords organized and away from moving joints.
-
-
Features That Don’t Matter:
-
RGB Lighting Accents: Built-in lighting strips add cable clutter and rarely complement professional desk aesthetics.
-
Excessive Tool-Free Knobs on Static Poles: Once set, static height collar screws rarely need adjustments; standard hex bolts work just fine and look much cleaner.
-
Long-Term Cost & Total Value Analysis
A quality tall monitor mount is a durable investment that can outlast several computer upgrades.
+---------------------------------+-----------------------------------+
| COST FACTOR                     | REAL-WORLD VALUE IMPACT           |
+---------------------------------+-----------------------------------+
| Initial Purchase ($30 - $120)   | One-time investment lasting 10+   |
|                                 | years across multiple computers   |
+---------------------------------+-----------------------------------+
| Preventative Health ROI         | Helps reduce expenses on physical |
|                                 | therapy or chiropractic visits    |
+---------------------------------+-----------------------------------+
| Cable Extensions ($15 - $25)    | Long-term cost for 10ft power and |
|                                 | DisplayPort/HDMI cables           |
+---------------------------------+-----------------------------------+
With price ranges spanning $30 for basic static poles up to $120 for heavy-duty gas-spring systems, tall mounts offer long-term value. Unlike monitors or PCs, steel mounts have no digital lifespans—a sturdy mount can serve your setup through multiple display upgrades over a decade.
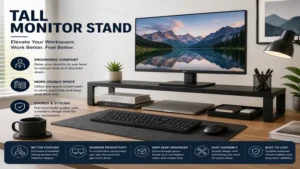
FAQs
❓ Can a tall monitor stand handle ultrawide monitors?
✅ Yes, provided the monitor’s weight falls within the stand’s rated payload capacity. Always check the display’s weight without its factory base, as ultrawide screens place higher rotational forces on VESA tilt joints…
❓ Will clamping a tall mount damage a wooden desk surface?
✅ Clamping directly onto raw wood can leave pressure marks over time. Using padded rubber grips or steel mount reinforcement plates distributes the clamping force safely, preserving your desktop’s finish…
❓ How high should the top of my screen be placed?
✅ The top third of your display screen should align directly with your horizontal eye line when sitting upright. This posture allows your eyes to scan down naturally without bending your neck forward…
❓ Do I need longer cables when using a tall monitor stand?
✅ Yes, standard 3-foot video and power cables are usually too short for 39-inch tall poles. Upgrading to 6-foot or 10-foot cables provides enough slack for clean cable routing along the frame…
❓ Can I mount a tall stand on a glass desktop?
✅ Standard C-clamp mounts can shatter glass surfaces under pressure. Use a freestanding tall monitor stand with a weighted steel base or a specialized grommet mount designed for glass-top compatibility…
Conclusion
Elevating your display with a tall monitor stand is one of the most effective upgrades you can make for your workspace health and organization. By raising your screen to proper eye level, you eliminate forward head posture, reduce neck fatigue, and clear away the footprint of stock display bases. Whether you choose a high-reaching static pole for standing setups, a fluid dynamic arm for easy adjustments, or a freestanding base for delicate desks, matching the mount to your specific work habits yields huge everyday benefits.
Recommended for You
- 5 Best Tall Monitor Stand Options in 2026: Elevate Your Ergonomics
- Best Standing Computer Keyboard Stand: 5 Ergonomic Picks (2026)
- 10 Best Multiple Monitor Desk Setups for Peak Productivity (2026 Guide)
Disclaimer: This article contains affiliate links. As an Amazon Associate, I earn from qualifying purchases. If you purchase products through these links, we may earn a small commission at no additional cost to you.
✨ Found this guide helpful? Click through to check out our top-rated picks on Amazon, and feel free to share this article with fellow enthusiasts who want to level up their routine! 💬🤗